반응형
1. 리액트 앱 생성
npx create-react-app test-mocha2. 모카 설치
# yarn 으로 설치
yarn add mocha --dev
# npm 으로 설치
npm install mocha --save-dev
3. 모카용 assertions 설치
# yarn 으로 설치
yarn add chai chai-enzyme enzyme enzyme-adapter-react-16 cheerio --dev
# npm 으로 설치
npm install chai chai-enzyme enzyme enzyme-adapter-react-16 cheerio --save-dev
4. Babel 설치, 리액트 앱 용 Babel preset 설치
# Commonjs 를 위한 babel 설치
# yarn 으로 설치
yarn add @babel/core @babel/register --dev
# npm 으로 설치
npm install @babel/core @babel/register --save-dev

# React app 을 위한 babel preset 설치
# yarn 으로 설치
yarn add babel-preset-react-app-babel-7 @babel/plugin-transform-modules-commonjs --dev
# npm 으로 설치
npm install babel-preset-react-app-babel-7 @babel/plugin-transform-modules-commonjs --save-dev
5. svg 와 css 관련 라이브러리 설치
Babel 이 svg 와 css 를 설정하지 않기에 관련 라이브러리가 필요하다
# yarn 으로 설치
yarn add babel-plugin-inline-react-svg --dev
yarn add ignore-styles --dev
# npm 으로 설치
npm install babel-plugin-inline-react-svg --save-dev
npm install ignore-styles --save-dev
6. Babel 설정하기
.babelrc 파일 생성해서 설정
/* .babelrc */
{
    "presets": ["react-app"],
    "plugins": [
				"@babel/plugin-transform-modules-commonjs",
				"inline-react-svg"
		]
}
.babelrc 파일 대신에 babel.config.js 로 대체할 수 있다
babel.config.js 에서는 조건문 등을 이용해서 상황에 따른 설정을 변경할 수 있다
/* babel.config.js */
module.exports = function (api) {
    const presets = ["react-app"];
    const plugins = [
        "@babel/plugin-transform-modules-commonjs",
        "inline-react-svg"
    ];
   /*change this value when you have a lot of tests*/
   api.cache(false);
    return {
        presets,
        plugins
    }
};
7. 테스트 파일 생성
src / test 폴더에 App.test.js 를 생성한다
/* src/test/App.test.js */
import React from 'react';
import { configure, shallow, render} from 'enzyme';
import chai, { expect } from 'chai';
import App from '../App';
import chaiEnzyme from 'chai-enzyme';

import Adapter from 'enzyme-adapter-react-16';

configure({ adapter: new Adapter() });

describe('App Component testing', function() {
  it('App renders main message', () => {
    const wrapper = shallow(<App />);
    const editText = <p>Edit <code>src/App.js</code> and save to reload.</p>;
    expect(wrapper).to.contain(editText);
	});
  chai.use(chaiEnzyme())
});
8. package.json 에서 test script 설정
"scripts": {
    "start": "react-scripts start",
    "build": "react-scripts build",
    "test": "NODE_ENV=test mocha --require @babel/register --require ignore-styles src/test/*.test.js",
}
9. 터미널에서 실행
# yarn 에서 실행
yarn run test
# npm 에서 실행
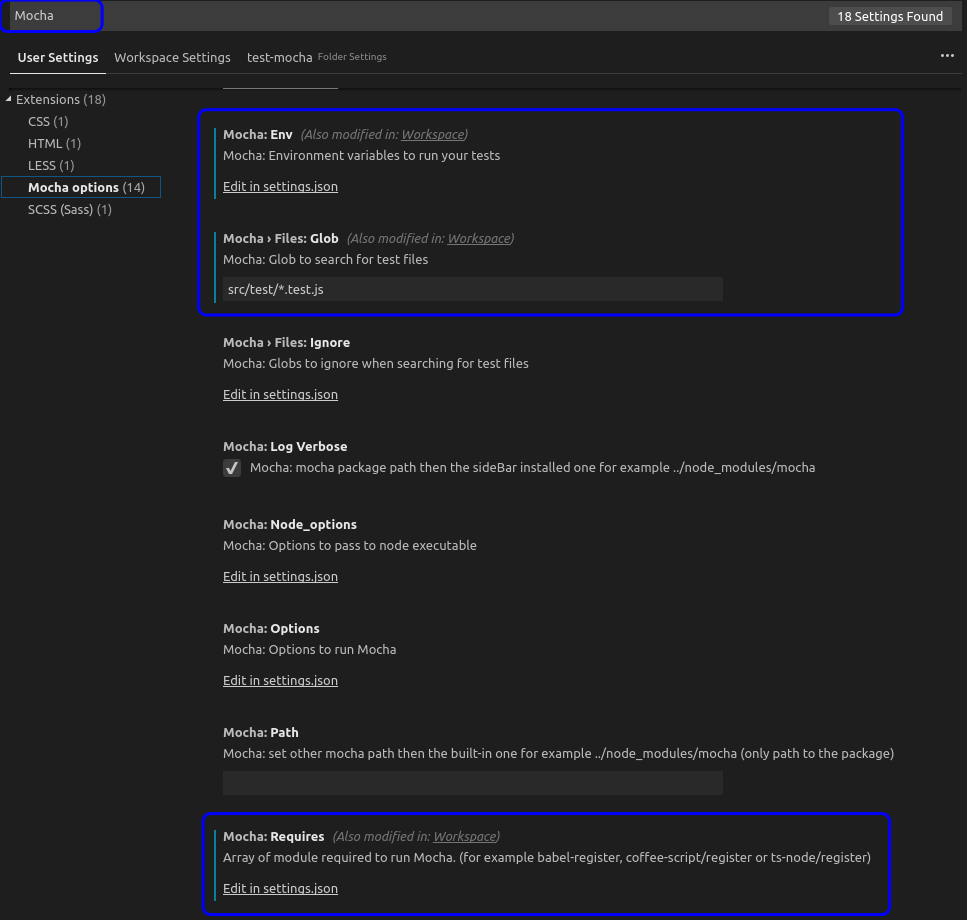
npm test10. VSCode 의 Extenstions 인 Mocha Sidebar 설치
VSCode 의 Extensions 에서 Mocha Sidebar 검색해서 설치
VSCode 의 Settings.json 에 설정 추가
"mocha.files.glob": "src/test/*.test.js",
"mocha.requires": [
	"@babel/register",
	"ignore-styles"
],
"mocha.env": {
	"NODE_ENV": "test"
}
11. Mocha Sidebar 에서 실행
참고포스트
How to setup unit tests with Create React App, Mocha and Visual Studio Code Mocha side-bar
We create our react app with Create React App npx create-react-app test-mocha 2. Install Mocha as a dev dependency, the test engine yarn add mocha --dev or npm install mocha --save-dev 3. Install Chai-Enzyme This library packs Chai assertions and specific functions to test React components, it depends on Enzyme, Chai, the Enzyme React Adapter (which is dependent on React version) and Cheerio.
Uploaded by N2T
반응형
'IT > React' 카테고리의 다른 글
| React Native 4가지 팁 (0) | 2022.09.14 |
|---|---|
| RN(ReactNative) ThemeProvider Jest 적용법 (0) | 2022.08.22 |
| RN(ReactNative) SafeAreaProvider Jest 적용법 (0) | 2022.08.22 |
| RN(ReactNative) TDD TODO 앱 디버깅하기 (0) | 2022.08.16 |
| RN(ReactNative) 디버거 설정하기 (0) | 2022.08.16 |
| RN(ReactNative) TDD TODO 앱 만들기 #8 (0) | 2022.08.12 |
| RN(ReactNative) TDD TODO 앱 만들기 #7 (0) | 2022.08.12 |
| RN(ReactNative) TDD TODO 앱 만들기 #6 (0) | 2022.08.12 |


